Friday, May 31, 2013

Scrapbook Ideas for Laser Tag Photos

Many families enjoy playing laser tag because it is an exciting way to spend time together. If this is an activity your family participates in regularly, you may have photos and mementos from these events that you would like to preserve so that your children can revisit them in the future. Scrapbooks are a creative way to preserve photos and mementos of life's most precious moments. Even with only the most basic supplies, you can create beautiful laser tag-themed scrapbook pages that are visually intriguing and subject-appropriate.

Glow-in-the-Dark Pages

Scrapbook Ideas for Laser Tag Photos
Scrapbooks are a creative way to preserve photos and mementos of life's most precious moments.
At many laser tag facilities, the game is played mostly in the dark; there are usually a number of glow-in-the-dark items or graphics around the arena for decoration and navigation purposes. Recreate this effect by composing your laser tag scrapbook pages on black construction paper. Use a sturdy photo glue to adhere your photos into place. Once your photos are in place, use craft supplies like glow-in-the-dark paints and highlighters to add glowing decorations to the page. The page will be visually intriguing in the light and your kids will have fun looking at their scrapbooks with a flashlight in the dark too.

Themed Scrapbook Pages

Many laser tag arenas are decorated around a certain theme, like space travel, jungle war or alien invasion. Similarly, you can use one of these themes to create your laser tag scrapbook pages. Adhere your photos to your craft paper of choice and decorate them according to your chosen theme. For a space theme, small plastic glow-in-the-dark stars are great, as are stickers, pictures and drawings of planets, aliens and spaceships. Using a theme to create a decorative scrapbook page will give the page flair and cohesiveness.

Laser Illusion Pages

The game of laser tag involves the use of lasers which are aimed and '"shot" at opponents to score points. The lasers are luminescent and colorful, and these characteristics can be easily recreated in visually exciting scrapbook pages. To create page decor that looks like lasers, feature a thick, black piece of construction paper as your scrapbook page and use neon-colored chalk, gel pens or even yarn to create straight lines randomly on the page. The lines should be of various lengths and angled in different directions to really give the page a laser feel. Create your laser lines before adhering your pictures to avoid marking on your photos.

Paint Splatter Pages

Laser tag is played in the dark and is an exhilarating mix of darkness and flashes of color. Play up these components of the game with splatter paint-themed pages. Using dark-colored paper and neon paints, splatter paint on your paper with a paintbrush. The paint will create intriguing patterns on the paper and, after it dries, you can apply your pictures and mementos with craft glue as normal. Splatter painting can be messy so this activity is best done outside where there will be less cleanup.

Tap Your Creativity with Digital Scrapbooking

All of us are fond of pictures as they capture our memorable moments. Whenever we view these images, we tend to become nostalgic. But, sometimes, just checking out the simple album of photographs might become an unexciting and boring event. Therefore, the activity of scrapbooking came into the limelight, and it was enjoyed by various people of all ages and classes. The main reason is that it enables them to stock up photos in an album and then attach a comment. The comment is usually something that matches the mood captured on the photo. Many people have found this medium to be the most effective in keeping the memories alive. Even though they cannot remember the person every day, the scrapbook helps them to relive the whole situation where the photo was captured. With the advent of computer, digital scrapbook got prominence and newer and more exciting ways got unveiled.

Tap Your Creativity with Digital Scrapbooking
Apart from creativity, the advantages of digital scrapbooking are that it is more convenient and less messy
You are entitled to accumulate all the photos and albums on the computer's hard drive, and the digital scrapbooking will allow you to attach graphics on them to enhance the outlook of the simple photographs. Additionally, you can also create a digital scrapbook with a theme work. While you are using the graphics and themes to adorn the picture or an album, you are actually tapping your creativity. There is no training available for creating a digital photo album; all that is required is your personal approach and emotions. Once both the factors are added in the creativity aspect, you will notice that you have reached the heights of originality. Without any special or prior knowledge about graphics, you will be able to design a beautiful digital photo album. In case you find any difficulty, then a simple, affordable and high quality solution to your scrapbooking needs is at your service.

Apart from creativity, the advantages of digital scrapbooking are that it is more convenient and less messy. You will notice that unlike conventional scrapbooking, this completely avoids the use of any paper cutting or pasting work. Once you have created a digital scrapbook, you might fall in love with your design and collection. And, you would be eager to have it in a physical form.

Your wish will be granted, thanks to digital photo printing. It is easy to do because there are various service providers that are dedicated to deliver the superior quality print outs in their sequential order and even bind them together for proper storage. Moreover, you can even add colored papers to the digital photo album. Similar to traditional scrapbooking, the digital scrapbooking will also let you write comments on them.

Other than that, you can even upload your striking digital scrapbook online so that your friends and close ones can appreciate your creativity and beautiful collection of photographs, even though they reside on the other side of the world. So, be it a wedding album, or birthday parties' photographs or graduation pictures; digital scrapbooking will keep all the memories alive.

Thursday, May 30, 2013

Important Scrapbooking Materials For You

Keeping a useful supply of scrapbooking materials in stock should be a vital thing of any scrapbooker's to-do list. Experienced scrapbookers know that a great idea or motivation could strike them at any given moment, so it could be immensely annoying to go to your work space and realize you are low on papers or embellishments.

Keeping a useful supply of scrapbooking materials in stock should be a vital thing of any scrapbooker's to-do list. Experienced scrapbookers know that a great idea or motivation could strike them at any given moment, so it could be immensely annoying to go to your work space and realize you are low on papers or embellishments.

Important Scrapbooking Materials For You
Experienced scrapbookers know that a great idea or motivation could strike them at any given moment

However, it would be not practical to keep all the scrapbooking materials you could find at your neighborhood craft or hobby shop, and so I have prepared a list for you to learn what are the most important supplies that you should always have in your work space.

  • Albums - This is the base of all your pages, so it's a no-brainer to include this as one of the most essential things to always have on hand. You don't have to purchase lots of them; simply think about what you normally scrap about or what your preferred themes are, then keep a few albums on hand (two to three would be ideal) to accommodate those. If you can, also try to have a minimum of one album in a 8 1/2" x 11" size and another one in a smaller 8" x 8" size.
  • Page Protectors - It will not be appropriately named a scrapbook if it didn't have page protectors on it. Such materials are what keeps your pictures and templates secured and safe for years to come, in order that your children and also grandchildren could enjoy your masterpiece in all its glory. There are generally two types of page protectors offered - clear and non-glare, thus I suggest keeping one or more of each.
  • Paper - Whether for backgrounds, layers, or other things, you need paper if you need to create a scrapbook. Designed or textured paper alone may be used in a lot of imaginative ways to both act as backgrounds and embellishments together, so be sure to have lots around.
  • Glues - Just put, glues are what keeps your photographs and embellishments in place, right where you want them to be. Of course, you cannot use just any kind of adhesive; at the very least, you'll need something to secure your photos into place without destroying them over time. Choose the ones that are non-toxic.
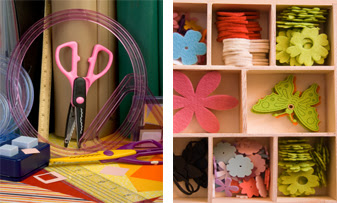
  • Scissors - Another important scrapbooking item that you should have with you and ready to go. Many people use tools like an exacto knife or a paper cutter, but a good pair of scissors are able to do the job if you don't have the others. Keep the scissors sharp and clean; making use of old scissors which are not quite sharp will run the possibility of damaging your paper or photographs.
There are other scrapbooking materials that you might need in the future, like cutting mats, colored markers, pens, pencils, plus a few types of paper and adhesives. Nevertheless, you may buy these supplies at a later date, after ensuring that the most necessary materials are now on hand and ready for usage all the time.

Wednesday, May 29, 2013

School Scrapbook Ideas Using Moxxie

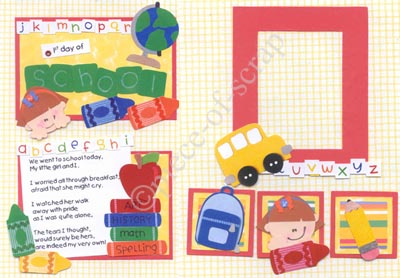
Moxxie scrapbooking supplies provide you with everything you need to create school-themed scrapbooks. The company makes products that are grade-specific and that reference school milestones such as preschool graduations. There are generic school items such as school buses and chalk boards so you can create pages that reflect those special moments that are specific to your child.

School Scrapbook Ideas Using Moxxie

Papers

Choose school-themed paper such as Moxxie's grade-themed papers or use Moxxie's solid papers in your school colors. Add complementary papers. Choose colors that match the predominate color of the pictures you're using in your school-themed scrapbooking pages or choose papers that match the colors of the classroom for a personalized look.

Card Stock

Choose Moxxie's card stock for journaling. The card stock pieces are cut into small squares that make it perfect for writing memories of special school events such as assemblies, award ceremonies and field trips. Card stock is thicker than paper but it will go through your printer so you can type your journaling tags.

Kits

Choose school-themed kits from Moxxie such as "School Zone" or "Senior Prom" kits. Kits include everything you need to complete several scrapbook pages. They have coordinating papers, journaling tags, stickers and embellishments. The only thing you need to add is your pictures.

Embellishments

Moxxie makes several school-related embellishments. Most are rub-ons that celebrate such things as the first day of school, team spirit, school dances and graduation. Moxxie also has rub-ons that are decorative that match their school-themed embellishments. Use the decorative designs to enhance photographs and tie two pages together for a larger layout.

Sunday, May 26, 2013

Learn More About Scrapbook Photo Album

An effective way of keeping photographs is by organizing it in a photo album and this is great but if you want to add a little twist you can make a scrapbook photo album. This may be time consuming compared to stacking the photos in an album but admit it, this is more fun and you can add your own taste and style in keeping your photos. Creating a scrapbook is priceless because it is done by you and every minute you spend in making the scrapbook is precious not only because you have exerted so much effort into making it more "personal" but also because you have added love into it.

  • Gather all materials for the scrapbook making like special paper, scissor, stickers, ribbons and colored pencils. Make sure that you are using an acid-free paper to prevent damaging the pictures.
  • Make a theme or a timeline when making your scrapbook photo album. Example, if you decide to display your photos on your wedding day make sure that you have stickers, printouts or special paper that coincide with the wedding theme. You can also include your wedding invitations, little souvenirs and wedding gift cards given by the guests in your scrapbook.
  • Avoid using newspaper clippings with your photos instead have it photocopied using an acid-free special paper. Remember that some newspapers and magazines can damage a photograph because of the acid content of the paper.
Pictures can be ones window from the past and the one thing that is of concern to all of us is how to make photos last longer. There are so many products available in the market these days that can help prolong the life of a photograph. Consider, for example, a photo mat. It may seem a very simple construction of paper or wood but it is actually very helpful in protecting your photos and the picture frame. Many don't realize how important it is to make use of a photo mat because they do not know the importance of this innovation.

Learn More About Scrapbook Photo Album
Printed paper is best used as an accent rather than a background, as it's often "busy" and your photos may not show up well on it

You can also use an acid-free photo albums, many companies already realized that using an acid-free material to store photos is important to keep the pictures in its original state that is why you should make sure that you work with acid-free products with your pictures.

Scrapbooking has skyrocketed to the top of the list of favorite hobbies of Americans. I recently read that there are more scrapbookers than golfers in the United States! Scrapbooking helps you to preserve your memories, organize your photos and perpetuate your family history. Maybe you've decided to jump on the bandwagon, but you have no idea how to get started.

So what supplies do you need to begin scrapbooking? The number of scrapbooking supplies available can be overwhelming to the beginner.

First of all, you need an album. Make sure it's made from archival quality materials. That way it won't harm your precious photographs. There are all kinds of albums, but my favorite is a 12x12 album with clear pages open at the top (called top-loading.) With this kind of album, you make your page on a sheet of 12x12 cardstock and just slip it into the plastic page, which will protect it. There is no need to buy page protectors separately.

Next you'll need paper. Get several colors of plain cardstock. This can serve as backing for your pages as well as paper on which to mat your photos. You may want to invest in some printed paper, too. Printed paper is best used as an accent rather than a background, as it's often "busy" and your photos may not show up well on it.

You need adhesive with which to attach photos and embellishments. I prefer tape runners, which are easy to use and dispense small pre-cut pieces of double-sided tape. Some people like to use glue sticks, squares of double-sided tape or some sort of cement. Just make sure it is photo-safe.

Of course, you need scissors to cut things out. Another great investment that I use constantly is a small paper cutter. Mine cuts paper up to 12x12. I use it to trim photos as well as paper.

The last thing you absolutely have to have is pens. Buy ones that say they are archival quality or photo-safe. You may want both fine-tip and calligraphy-type pens. You'll use these for captions, journaling, and dating pictures.

Thursday, May 2, 2013

Simple Scrapbook with Retired Rubber Stamps

Simple Scrapbook with Retired Rubber Stamps

What Is A Simple Scrapbook?

Simple scrapbooks are projects where a lot of the work is pre-designed and completed. All the scrapper needs to do is add some embellishments and pictures and the page is ready to go.

To know what a simple scrapbook is, one must know what a complex scrapbook is. A complex scrapbook has many elements and layers that involve many accessories, pieces of equipment and costly embellishments. To create a simple scrapbook, the scrapper will abandon all the time consuming and complicated elements. All that is needed are a sharp scissors and some good adhesive.

These are some of the elements that can help a scrapper to create a simple scrapbook.

Have the Basics

To have a simple scrapbook the scrapper needs to just have the basic elements. Attractive quality paper is the base. Then include a heading of the theme for the page. Add a mat that will support one nice photograph. Add the photograph to the mat. These are the basics of a scrapbook page. Anything beyond these basics is simply for fun and creativity.

Pre-Cut Mats

Using a pre-cut mat is an excellent way to add dimension and emphasis to a focal point on a scrapbook page. What makes it simple is that the scrapper doesn't need to cut the frame to size and often not do the layering. The pieces are already created. It just requires add the picture and adhesive.

Sticker Borders

A fast element to add to the page is a border, but the easiest border to add is a sticker border. To add this element the scrapper doesn't even need to add adhesive to the border. It is as simple as peel and stick.

Pre-cut Die Cuts

Cutting individual die-cuts can be time consuming and can require purchasing a lot of templates. A simple version is to buy packages of pre-cut die cuts. These can be purchased in themes such as birthdays or vacations. Then the scrapper only needs to add adhesive to make the items stick to the page. No time consuming cutting.

Sticker Letters

Using self-adhesive letters can be a great way to add simplicity to a scrapbook. Select the main letters for the heading desired and add it to the page itself or to a boarder piece and then add to the page. This is much faster than doing a lot of die cuts or journaling to say the same thing.

Metal Accessories

Metal Accessories such as grommets and eyelets can take time to add to a page. They usually require a matt, punch and other tools. To make the scrapbook page simple, purchase papers, mats, and notes that have the metal effects already incorporated. The result will look like a lot of time and effort was put into adding these effects, but the company did all the work for the scrapper.

Pre-designed Pages

A very simple way to make a scrapbook is to purchase a pre-designed flat paper scrapbook. These books can be purchased easily. They have headings and borders as well as printed embellishments on the pages. It does not have dimension, but it is especially a great option for children who wish to make their own scrapbooks without spending a lot of time on them. All that is needed for these scrapbooks is pictures.

Scrapbook Kits

Another great option instead of taking the time to design pages personally is to purchase a pre-designed kit. With this purchase the scrapper will receive a scrapbook, matching papers, stickers, borders and embellishments. The concepts of the pages are already created. All the scrapper needs to do is arrange the pages. What makes this a simple scrapbook is that most of the thinking and designing is done for the scrapper. Pages can be put together in minutes and it will look like hours were spent on the pages.

Small Accordion Books

Thinking small can be a great way to make scrapbooking simple. Accordion books are basically pieces of cardstock that have been folded like an accordion and then tied. It makes it easy because the pages are small. One picture will fit on the miniature page and the next page can be used for embellishments. A mini-accordion book can probably be put together in about one hour. These are fun books to make for moms and grandma's to keep as a purse pocket scrapbook.

Simple Themes

It is best to complete a simple themed project first. Beginning with a big even such as a wedding day can be a rough start just because there is an awful lot of material to scrap. A simple scrapbook also means selecting a simple theme. Instead of choosing to scrap the entire wedding, instead just do a small book about the honeymoon or a bridal shower. Divide the theme down and this will make the scrapbook a little simpler.

Enjoy using these simple scrapbooking tips and the idea of making a scrapbook will appear to be an easy project.

Finding Those Scarce Retired Rubber Stamps for Scrapbooking and Crafting

Are you having trouble finding just the right rubber stamp design? Of course, with creativity, you can always manage to create your own designs and shapes, but there are probably some unique rubber stamps that you might have missed buying when first released, but can be found a few months later, in the retired category of rubber stamps. With a little persistence, if there is a rubber stamp set or design you are looking for, it will often have a second life, making it possible for you to find again.

Retired stamps are those art rubber stamps that have been kept aside by stamp illustrating companies, as new designs have now arrived. Retired stamps are usually released annually by the company, for resale, in that particular category. Because they offer unique designs compared to what is available in the market, retired stamps are very popular among buyers.

Usually, the retired rubber stamps will be a small or large set of related stamps with a specific theme. Popular retired stamp themes include: animal themed sets, children or babies, and flowers and nature. Hard-to-find sets with very specific and unique designs will also have an increasing popularity after their retirement, since a specific design subject may be few and far between. In fact, it may be such a unique theme or interest, that there may be only one set every created for that design.

However, even the 'retired' category rubber stamps are only offered for a specific time period. If you missed the time frame when the stamps are offered directly from the company, you still have some other alternatives. One great choice is joining online groups or clubs that specialize in rubber stamp sells and trades. There are many rubber stamping tip groups, but you are better off finding those that only do product trades or sells, as you'll have the best selection to choose from. Another solution is to check out rubber stamp specialty websites, as there are several who specialize in a specific company's retired designs.

If you are yearning for a specific retired rubber stamp design, don't give up! A great way to find these treasures is to start a want list, and keep it handy while you're cruising online or browsing rubber stamp groups. If you see a stamp or set that looks familiar, you can always refer to your list, and snatch up the appropriate rubber stamp. Remember, retired doesn't necessarily mean gone forever.

Friday, April 26, 2013

Important Scrapbooking Techniques Available Today

Important Scrapbooking Techniques Available TodayScrapbooking can be defined as an activity of preserving memorabilia and legacy through notebooks called scrapbooks. The person puts down his thoughts, ideas and feelings in the scrapbook and decorates it in a cheery, beautiful and creative manner. The whole idea of a scrapbook is to create a visually attractive designed book whereby, a person can combine his thoughts and ideas with a touch of beauty and glamour. Instead of keeping a mundane daily diary or journal, one can make a cheerful scrapbook.

Today's digital age has taken over almost every walk of life. Scrapbooking is no exception to this occurrence. Digital scrapbooking is now rampant and is serving as a tech-savvy way of keeping a scrapbook. Printers, scanners and desktop publishing have all taken scrapbooking by a storm. The internet is providing the scrapbookers with a wide range of scrapbooking options and aims to accrue the benefits of online scrapbooking in the dozens of social networking websites available before us.

Scrapbooking is now a commercial activity. It has a lot of its small-scale status and is expanding by the day. Scrapbooking has evolved greatly over the past few years and this has given rise to an interesting variety of scrapbooking techniques. A scrapbooking technique is not something that fits in a set mould. In fact, all of us can devise our own scrapbooking techniques. But certain techniques pertaining to the various aspects of scrapbooking are truly beneficial.

Various websites outsource scrapbooking techniques. Some books have been compiled for the same. The whole process of scrapbooking is a great learning process and we can find discover interesting techniques whilst making a scrapbook. We can share these with our friends and learn some techniques from them. But all in all, certain standard techniques can prove advantageous to our scrapbooks in many ways.

The first most important aspect of scrapbooking is the choice of paper. A variety of paper that has a long life is sturdy and acid-free should be preferably chosen. Thereafter, one should design a plan for scrapbooking. All the materials to be used in the scrapbook should be carefully planned and selected. We should have a clear idea of the entire design of our scrapbook. The correct variety of pens, inks, stencils and embossing material should be used.

Most sources outsourcing scrapbooking techniques emphasize on the need for creating an index page or highlight pages to locate them properly. Special pages should be decorated in special colors and symbols should be designed for such pages. Bookmarks with tassels can do wonders to your scrapbook. Tassels can be used in various areas of your scrapbook.

Decoration is perhaps the most important aspect of scrapbooking. Most sources outsourcing scrapbooking techniques suggest the need for choice of the right type of decoration. Decoration should be chosen carefully and should be minimal but sufficient. Too much of decoration can make your scrapbook look gaudy and overdone. Stamps, ribbons, embellishments, stickers, rub-ons, snow globes etc can add a dramatic touch to your scrapbooks, provided they are chosen carefully and used appropriately.

Pop-up pages for your albums, papers pierced with interesting trinkets, peek-a-boo pages, punch craft, panoramic pages, layering etc can do wonders to your scrapbook. The world of scrapbooking design and layout techniques is huge and diverse. You can explore some of these to add a touch of versatility to your scrapbooks project.

Five Steps on Putting Your Memories Together to Make Your Perfect Scrapbook

So you are interested in scrapbooking and want to make your very first scrapbook project. That is wonderful and I am sure that you will find scrapbooking to be a lot of fun. Although the decision may have been made, I have found that for many first time scrapbookers, it can be difficult to get started.

Walking into a craft store, it can be overwhelming, to say the least. There are hundreds of items to choose from and even choosing the scrapbook itself can be daunting. Purchasing the supplies can be very expensive, especially if you are unsure what you need and many first time scrapbookers get pulled into buying things that they only use once or twice.

To avoid this, there are a few things that every new scrapbooker should do before they head to the scrapbook store.

Five Steps on Putting Your Memories Together to Make Your Perfect Scrapbook
Steps on Putting Your Memories Together to Make Your Perfect Scrapbook

Get Organized

Before you make a scrapbook, it is important to really get organized. Go through all of your photos and find out which ones you want in a scrapbook and which ones you don't. Remember that not all of your photos will be in a scrapbook so don't feel the pressure to put them in.

Once you have pulled out the photos you want in a special book, start organizing them into themed pages. Birthdays, vacations, special events or special memories that you want can be the themes that you sort by. Place them in a photo box with dividers identifying the theme or the event so they don't get mixed up.

Decide on the Scrapbook

Next, decide on the scrapbook before you get ready to make it. This means that you will need to decide on whether you want to have a large 12 by 12 page scrapbook or a smaller one. You can find them in many different sizes, although most scrapbookers prefer the larger 12 by 12 paged books. The smaller books are more cost effective and may be a better way to start out in the world of scrapbooking.

Once you have the size, determine if your scrapbook has a theme. You could do a couple's scrapbook, a baby's scrapbook, family memories, family trips, the dog's scrapbook and so on. There is no wrong theme and if you simply want one big book with everything, don't hesitate to make it.

Find a Scrapbooking Group

While you don't need to do this, it does make scrapbooking more enjoyable. In addition, there are many crop meets and stores that offer crop nights so you can gain some experience and help with ease. The main reason why I recommend that you find a scrapbooking group or crop night is because many scrapbookers will share materials and tools with new scrapbookers. This will help cut down on the overall cost until you are sure this is the hobby for you.

Purchase the Main Supplies

Go to the store and purchase the bare necessities for your scrapbook. Start with cutters, glue, double sided tape and a few embellishments that you enjoy. While the first few pages may not be as cutting edge as your later ones will be, it helps to start small and then slowly build up your supplies. It is also healthier for your wallet.

Make your Scrapbook

Finally, sit down and start design and making your scrapbook. Use other people's scrapbooks design or layout for inspiration or use a scrapbooking kit for the first few pages. When you are making a scrapbook page, cut all your photos and paper and then place it on the main page before gluing. This will help you get the layout that you want without wrecking the paper. In addition, this habit will save you a lot of heartache over the years as you create pages after pages for your scrapbook.

In the end, making a scrapbook is very easy; however, being organized, finding a good group to scrapbook with and finding your inspiration will make it even easier.

Monday, April 22, 2013

An Introduction To Hybrid Scrapbooking

Scrapbooking is now more popular than ever and hybrid scrapbooking is the latest phase. It combines traditional and digital elements that can be used to create even better scrapbooks design and layout.

An Introduction To Hybrid Scrapbooking
When creating a hybrid scrapbook, it's important to strike a balance between traditional and digital. For example, you could doctor a couple of photos using photo editing software and add a bit of text. Then you can print and integrate that with what was your traditional scrapbook, but is now your hybrid scrapbook.

Or you could take the opposite approach and design your whole page layout on computer. Papers, backgrounds, textures, type and images can all be created digitally. All you need to do is print the layout, add a few physical embellishments and you've transformed digital into hybrid.

The choice is yours and, with this in mind, here are three hybrid scrapbooking benefits that can help you to create great scrapbooks.

Edit and enhance your photos

Digital scrapbooking gives you the chance to enhance your photos with tools that adjust and correct issues such as color balance and red-eye with effects that add style and pizzazz.

Impossible in traditional scrapbooking, editing photos in such detail is the ideal way to get the best of both worlds. You have a printed picture - enhanced with easy-to-use repair tools and effects - that produces great results in hybrid scrapbooks.

Add physical embellishments for a hands-on experience

Embellishments that you, your friends and family can physically feel are the best way to stay in touch, literally and figuratively, with the memories in your hybrid scrapbook.

In other words, they are a little bit more than just images. These personal elements, such as certificates, movie stubs or newspaper clippings are representations of parts of your life.

It is worth bearing in mind that the feel and overall experience conjured up by a traditional scrapbook can be much more rewarding than a digital alternative. It provides a more personalised journey into your memories, not just for you, but for any friends or family who handle it.

Online resources open up all sorts of possibilities

Resources such as images, fonts and backgrounds are at your disposal, both through digital software and online. This means that there are a lot more options available to you when it comes to embellishing or decorating your scrapbook.

Take typography for example. A hybrid scrapbook allows you to write notes or journal entries yourself, just as you would in the traditional manner. Handwritten messages are a lot more personal.

But it also enables you to access thousands of different fonts. You can then edit and apply effects to these fonts in the same way that you would to other elements, further enhancing your scrapbook's pages.

With the benefit of being able to edit your photos and draw upon the resources of the internet, you can enhance and transform your pages into great hybrid scrapbooks, while keeping in touch with the physical feel of the final product.

These are just three benefits of traditional and digital scrapbooking that, when combined, will help you to create your very own unique hybrid scrapbook.

Sunday, April 21, 2013

Creating a Fantastic Scrapbook with Ribbon

Scrapbooking Tips for Creating a Fantastic Scrapbook

Making your own scrapbook has never been simpler. There is a wide range of amazing scrapbook supplies you can find online and in stores.

First, you should select what type of scrapbook you would like to make. There are different sizes which are available in bookstores and online.

Creating a Fantastic Scrapbook
The most common sizes are the 8x12 and the 12x12 inch formats. Those formats are more costly but they have qualities that are above average and that can contain a large number of collections.

The 8x11 format works the best as it can fit the ink jet printers that are generally of the same size. You can also use 3 ring binders, which is a great option for a scrapbook.

You may even place the pages similar to the format of a post type binder where you can create a double outline. The sheets are attached closely in order that they can be used as one outline. Even if they are not put separately on the printer you can develop footage on that format.

There are far more cheap paper and scrapbook layouts that you can get in the 8x12 format. Keep that in mind when shopping for binders and themed paper.

Three ring binders for a scrapbook allow you have to have more for your photos. Actually it is better to have a top quality binder available before you arrange your photos.

It is not a good idea to use a spiral non-removable scrapbook since you'll be limited on one special page and you may want to rearrange the pages. It is not unusual for people to find they want to insert photos somewhere in the scrapbook after completing it. If you choose a non-removable scrapbook binder this will not be possible.

There are themed scrapbook supplies that may exhibit those fun memories. Even your children will have fun looking at the photos in your scrapbooks, seeing how trends and styles have changed. Friends and neighbors visiting your home might enjoy flipping through the pages instead of just taking a look at old photograph albums.

Naturally it is always delightful to recollect the moments in your life by taking a look at your memory book. No matter how long you have your scrapbook, you will enjoy looking through it over and over again.

Each page can be themed differently. By employing the same color on the background you can save more time and money. When it comes to design there is no limit with all the scrapbook supplies at your disposal.

Scrapbooking Ideas with Ribbon

Ribbons are a cost effective and cheap way of adding embellishments to your scrapbooking layouts. Ribbon, although simple, can be used in many different ways, and here are some scrapbooking ideas to get your creative juices flowing when scrapbooking with ribbon.

Scrapbooking Ideas with Ribbon

Ribbon comes in many different widths, colors and patterns, and you will always find something to compliment your layout.

Heritage layouts do well with ribbon. It somehow adds that old fashioned touch to the layout. Try taking an old oval black and white photo and embroidering some ribbon around the edges to frame it. You can even buy ribbon that has already been made into roses that you can frame your photo's with.

Another way to frame your photos with ribbon is to punch holes into the matting on the photo at even spaces around the edges. Now take a variety of ribbons and tie short bits through the holes. This is a very attractive way to frame your photos.

Ribbon can be added to digital layouts to give a more 3D look to the otherwise pretty flat layout. There are many ways in which to do this. Try framing your layout with strips of thin and thick ribbon. You could also weave a few strands of ribbon together. Try contrasting colors for an even prettier effect.

Try attaching items to your layouts using ribbon. Try plaiting thin strips of ribbon together and using the plaits to hang items on your layout. Try making your ribbon into a sort of washing line that you can peg other items to using mini pegs.

Try using different widths of ribbon with the wider one at the bottom and the thinner one stuck on top and use these strips to decorate your background. You could also try using strips of ribbon to decorate your background almost like a wall paper effect.

Try using ribbon to make rosettes to embellish your layouts with. Place a button as the center and gather the ribbon around the button. You can do as many layers and colors as you like here. Ribbon flowers can be made in the same way. The best way to gather the ribbon is to sew a running stitch with your sewing machine or by hand down the edge of the ribbon, and then pulling the ends of the thread to gather the ribbon and shape it around the button.

Ribbons tied in bows work a treat. You could place a bow at the corner of a photo, or the corner of your layout. Try tying tags to your layout with bows. Bows make wonderful embellishments; just don't go to overboard here.

Don't be afraid to experiment with scrapbooking with ribbon. There are loads of different ways you can use it to make stunning layouts.

Saturday, April 20, 2013

Secret of Recycle Scrapbooking

Secret of Recycle Scrapbooking

Do you know about recycle scrapbooking? I have learnt about recycle craft, but not too sure about recycle scrapbooking, until one day my 3 years old daughter show me her scrapbooking using recycle material that she used to keep her craft and papers. My little angel gave me an great ideas of how we can recycle our children school craft to create a very creative memories craft! Here I share my experience and 7 secret of recycle scrapbooking, if you are a cost saver person, you may find it useful!

Secret #1 Think Twice Before You Throw Anything.

Lots of material at home such as color paper divider of your file folders, your childrens' craft work from school, faulty printed paper, tissue paper cover, presents wrapper, ribbons etc if the design is neat, clean and nice looking, keep them for your scrapbooking materials. You can use them as embellishments or decorations in your scrapbooking project. I used to throw all these away, but now I am getting passion on recycle all the them!

Secret #2 Storage For Recycle Stuff.

You need to have some storage space to keep all your recycle stuff, try to keep in sorted or grouping by same category for easy of searching.

Secret #3 Recycling From Other Craft.

If you have been doing lots of craft at home, reuse this craft material again to do recycle scrapbooking. For example, if you have created a pencil case craft using recycle cartoon box, cut out excess area of cartoon box into A5 paper size and paint some beautiful flowers or insects on it, join all the A5 drawn design together with a threading string or folder rings to create a mini scrapbook album.

Secret #4 Recycle Scrapbooking Paper Excess From Previous Scrapbook.

Reuse the scrapbooking paper that was excess from previous scrapbook. You can create a new design by using the excess scrapbooking paper. This can be done by doing patching or overlapping pasting different paper on top of each to create an unique look!

Secret #5 Recycle Your Digital Scrapbooking / Computer Scrapbooking.

You can reuse your same computer scrapbooking printed layout on another new scrapbook topics. Note that you also can recycle scrapbooking digitally besides recycling the printed layout. Besides that, there are a lot of layout, images or pictures on the web are free for download and you can reuse them for this case.

Secret #6 Print On Recycle Paper.

Print most of your design on recycle paper. This is to save cost at the same time save the earth. Most of the printers will print a test page when you changed new cartridge, keep this paper for recycle printing purpose. Perhaps the test printed page can be reused to create another creative memories, because the test page always printed in multiple colors and text.

Secret #7 Do It Freely.

Last by not least, create your every scrapbook freely. It is important if you are using recycle stuff to scrapbook. Do not restrict your creative mind to fly. Explore along the way, will help you have more creativity ideas to create a unique design of your creative memories.

Tips To Improve Your Scrapbook With Stickers

After many devoted hours, you have assembled your precious photos and memorabilia and arranged them artistically on your scrapbooking pages layout. You sit back and look at them carefully. You think to yourself, ‘they look great, but they are not complete and need a little extra something…of course, scrapbook stickers!’

What can scrapbook stickers do for your scrapbook pages?

Scrapbooking stickers can help to transform your great looking scrapbook pages design into scrapbook pages that have that ‘WOW’ factor. Just by using scrapbook stickers, your scrapbook pages layout can miraculously change to something special…artistically special. There is a huge selection of scrapbook stickers available for every occasion and they are relatively inexpensive.

Tips To Improve Your Scrapbook With Stickers
Scrapbooking stickers can help to transform your great looking scrapbook pages design into scrapbook pages that have that ‘WOW’ factor.

Prevent damage to your memorabilia by purchasing the right sort of scrapbook stickers.

Before indulging yourself in this virtual ‘Treasure House’ of scrapbooking stickers however, make certain that the scrapbook stickers that you buy are acid and lignin free to help prevent yellowing and damage with age.

What can you use scrapbooking stickers for?

One of the main uses for scrapbook stickers is as a page's border. This could be either around the edge of your scrapbook page or around your photos or items of memorabilia. There are many themed scrapbook stickers that are ready made for you to use. If you find difficulty in laying the border down straight, instead of applying it direct to the background paper, mount in on cardstock first. Then, cut round the scrapbooking stickers and mount it on the page as you would a cut out.

You could use scrapbook stickers to fix photos and memorabilia in place. Try scrapbook stickers that enhance the theme of the page.

There is a huge range of alphabet scrapbooking stickers available that you could use to create artistic titles for your scrapbook pages. Word stickers can be employed for journaling.

Apply scrapbook stickers to pre-made tags and use as scrapbooking page embellishments.

Scrapbooking stickers are excellent for decoration and emphasizing a theme. Examples of this are using scrapbook stickers of footballs, baseballs etc. on scrapbook pages that have a sports theme. Glitter stickers, dress stickers, high heel stickers etc. would emphasize scrapbooking pages with a theme of a party or prom.

If you desired to include bullet points for emphasis, then scrapbook stickers could be used.

Are there any special fun type scrapbook stickers that you could use?

There are many varieties of this category of scrapbooking sticker available. It pays for you to look around and see what is available that would enhance your scrapbook pages. Some of these are of a layered type that produces a kind of 3D appearance.
  • Thin wooden scrapbook stickers that you can paint or decorate.
  • Rubber scrapbook stickers.
  • Quilted scrapbook stickers.
  • Vellum scrapbook stickers have a translucent quality to them.
  • Crystal and epoxy scrapbook stickers have a raised layer over them.
Remember to use scrapbook stickers to enhance your scrapbook pages and not detract away from your photos and memories, so be careful.

As you can see, there is a vast variety of scrapbooking stickers available to enable you to use your artistic talents to enhance your scrapbook pages layout and design to make them just that bit different.

Your scrapbook album is a record of your precious memories, scrapbook stickers can make even more precious.

Thursday, April 18, 2013

Choosing a Scrapbook Theme and Color

Making a scrapbook is a great way to preserve memories, and deciding on a scrapbook theme and layout is the beginning step in designing something to commemorate a certain celebration. Here are several scrapbook design ideas to help get you started.

Choosing a Scrapbook Theme and Color

The scrapbook theme can be easy or complicated. It could be a special event like a birthday, a baby shower, a wedding, Christmas, or Halloween. Scrapbook themes can also be personalized to the scrapbook recipient's special interests. Themes could involve sports, favorite television programs, music, the outdoors, or cultural influences.

  • What is the purpose for your scrapbook?
  • Who is this for?
  • Who is the scrapbook about?
The answers to these three questions are all elements in selecting an appropriate scrapbooking theme. For instance, the scrapbook you are giving your nephew as he graduates from medical college is maybe different than the grandparent book you send your mom. Your nephew will often cherish a scrapbook with footage, poems, books, and more masculine elaborations. The theme of the scrapbook may be medical. You could create elaborations that looked like knifes and tweezers around various photos of your nephew during his varsity years.

Your mom, on the other hand, will appreciate a great number of infant footage fancifully embellished with flowers, ribbon, and baby fingerprints. This scrapbook theme will probably be your baby. Footage could include baby and grandma with the baby. A nice journal about your baby's birth and include some pictures could also add a pleasant touch

Don't forget to create a interesting title for your scrapbook. Though adding a title might seem to be apparent or trivial, a title outlines the whole basis of your scrapbook. The title immediately tells the spectator what the page is concerning. In one word or one short phrase, the title tells the viewer the scrapbook theme and point.

Titles can be as basic as the date of an event, the name of an individual, or a particular event. They also might be more engaging and exciting. Titles can consist of quotes, proverbs, fillers, or easy phrases. The best places to have a look for title inspiration are in cards, adverts, and commercials.

Color choice is also important. Color coordination and contrast will highlight and accent your scrapbook theme. A well thought out color palette can help outline the theme of a page, attract attention to explicit items, or detract away from mistakes. Poorly selected color schemes, on the other hand, can cause your scrapbook page to look bad.
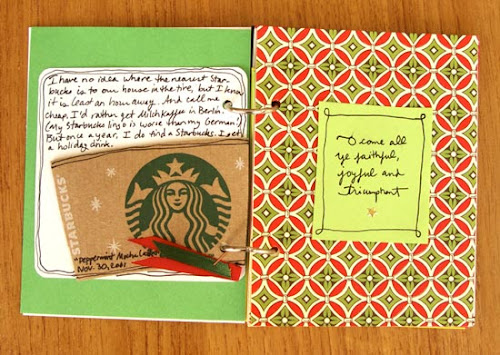
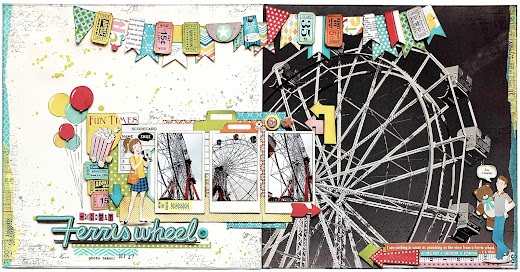
Background color can either be matched, coordinated, or contrasted with the colors in your photographs, or elaborations. Matching colors adds to the continuity of the color range. Coordinated colors add depth to scrapbook pages. Contrasted colors focus the eye. In this manner, color can be employed to form the effect you wish.

A excellent way to see how colors look combined is to collect and put alongside color wheels from your neighborhood paint or hardware store. Paint wheels are usually available free for the taking in nearly any paint dept.

Most scrapbooks will contain photographs. Even the most uninvolved reader of your scrapbook will glance at the photos. Photographs really are worth one thousand words. Thus , it's vital to choose photographs that are of good quality and clearly illustrate your scrapbook theme.

Any photograph can be employed in a scrapbook. Even instant photos may be employed in scrapbooking. Just take care the chemicals in the image do not spill out on the rest of your scrapbook. Digital pictures can simply be printed right onto lignin-free and acid -free paper.

Always keep in mind that scrapbooking is permanent. Therefore, it is maybe preferable to use copies of your only picture of Great Grandma instead of risk ruining the picture forever. Simply scan the picture on your computer scanner and print the photograph on lignin free and acid free paper.

Scrapbooking is enjoyable and gratifying. You are creating a book of special memories that is more impressive than a regular photo album. So select your scrapbook theme, get the basic scrapbooking supplies, choose some photographs, and get started.

Sunday, April 14, 2013

Scrapbook Ideas Using Starbucks Items

If you are an employee of Starbucks, or if you love hanging out with your friends and family in this cozy coffee shop, you might want to create a scrapbook of your time there. First, start by photographing the Starbucks sign, the front counters, the coffee makers and the table areas, all these items are important for you albums design and layout. If you are an employee, gather all of your work items, including your apron, hat, buttons and pay stubs. Anyone who wants to make a Starbucks album should also collect memorabilia such as cup sleeves, used gift cards, pastry bags, stir sticks, cups, and empty tea and coffee bags and other related items.

Scrapbook Ideas Using Starbucks Items
Add Starbucks items such as cut-out titles from Starbucks-brand coffee or tea, labels from sandwiches or the new Starbucks VIA instant-coffee packets.

Albums

Starbucks colors are black and green with occasional hints of red, so choose an album in one of these colors or combination of all. Another option is a coffee-brown-colored album. If you want a title on the front cover, add a Starbucks gift card to your album, centered on the front cover and decorate the border with color line.

Background Papers

Choose background papers in Starbucks colors or browns, creams, whites or coffee backgrounds. If you use cream or white paper, "antique" it by staining it with picture of coffee or tea. Create "pocket pages" by adhering the sides and bottom of a small Starbucks pastry bag to a background page to enhance the design.

Embellishments

Decorate your pages with little extras such as coffee stickers; brown, green and red ribbons; and rhinestones, brads or eyelets in black, brown, red and green. Create artful backgrounds and borders using rubber stamps. Press the stamps into brown ink and create images around the edges of your pages. Or stamp light images randomly all over your background papers to create a subtle backdrop for highlighting your photos and images. Add Starbucks items such as cut-out titles from Starbucks-brand coffee or tea, labels from sandwiches or the new Starbucks VIA instant-coffee packets. Place these items in opposite corners of your pages to create corner decorations or adhering to the page in any pattern you wish. Use the paper cup sleeves as background images; adhere your photos over them but leave the sleeves sticking out so they show.

Adding Memorabilia

Divide your album into several sections, including "Hanging Out at Starbucks" and "My Favorites." If you are an employee, also add "A Typical Day," "Uniform" and "Payday" sections; create a different unique design for each section.

For the "Hanging Out at Starbucks" section, describe who hangs out the most with you in Starbucks, and give details about what Starbucks means to you. Journal about reasons and why for hanging out at Starbucks, such as spending time with friends and family, studying or surfing the Internet while enjoying coffee or tea. For "My Favorites," attach photos of you drinking and eating your favorite food from Starbucks. Journal about your favorite brews and pastries and describe them in luscious detail.

In the "Typical Day" section, use photos of you serving customers, making coffee and cleaning up after your shift. Use small, clear, acid-free envelopes to add any of the awards you earned, such as the Green Apron Award, the "Genuine" pin or the MUG (Moves of Uncommon Greatness) award. Under "Uniform," include pictures of you in your apron and hat. If you kept an apron, tear a small swatch from it and adhere it to your page with a brad or ribbon. For your "Payday" page, include a photocopy of a pay stub and your W-2 if you have it. Journal about what you spent your paychecks on, such as, "I often turned around and bought more coffee!" or "I was a starving college student, so all of my checks went to buying books for my studies."

Tuesday, April 9, 2013

Scrapbook Embellishment & Art Scrapbook Ideas

Scrapbook Embellishments Ideas

Scrapbook embellishments are items added to a scrapbook page to define something you've done or add more detail and decor to the page layout you create. While scrapbook embellishments are to help the layout of your page, adding too many may take away from the most important aspect of the page itself, the pictures and memories placed on the page. When using embellishments be sure you don't get too carried away. Sometimes less is better.

Scrapbook Embellishment Art Ideas

Ribbons

Ribbons are available in many fabrics and almost any design you can think of. Ribbons can be used several different ways for embellishing a scrapbook page. One use is as a border. Outline the edges of your page or the pictures you've placed on your scrapbook layout. You can also cut a strip of ribbon six inches long and tie a bow in the center of it. Glue the tails of the bow to the back of a picture and place on your scrapbook page. This will give the illusion that your picture is hanging on the page, much like a picture hangs on a wall.

Stickers

Stickers are the most simple embellishment to use on a scrapbook page, not to mention there are stickers for just about any event you may encounter. If you've just started scrapbooking, using stickers for an embellishment idea is where you may want to start. From there, work your way up to more complicated or detailed embellishments.

Scrapbook Embellishment Art Ideas 1

Eyelets and Grommets

Eyelets and grommets are round pieces of colored metal. These are most commonly used on shoes--the metal pieces that protect the shoe from rubbing shoelaces. These metal pieces are popular among scrapbookers because they add embellishments to any scrapbook page without taking away from the pictures or memories they are displaying on the page.

Die-cut Images

Die-cut images are pre-cut images on pieces of card stock or scrapbooking paper. Die-cut images can be created in your own home with special tools or bought in craft stores pre-cut. Die-cut images are used to embellish a title of a scrapbook page or used to add little details to the sides of pictures. These images can be overlapped with other pre-cut images to add more depth and detail and look like a picture themselves when placed just right.


Art Scrapbook Ideas

Art scrapbooks can reflect your own special style and love of art. Incorporating art into scrapbooks is not difficult and will lend a tasteful flair to your creations. Whether you create the art yourself or incorporate printed copies of famous paintings, an art scrapbook will be a treasured keepsake or gift.

Mother's Day Scrapbook

Create a Mother's Day art scrapbook using the artistic creations of a mother's children. Children can paste their art in a scrapbook along with their photographs and write a special Mother's Day wish for their mother. Place photographs of family gatherings, birthdays and family vacations in the Mother's Day scrapbook, as well as the pages decorated by children with rubber stamps or drawings. Children can create a page of their own to show their mother how important she is in their lives. Print clip art pictures of things that the mother likes, cut them out and then glue them to pages in the scrapbook. Hand print a Mother's Day poem on decorative paper and include it in the art scrapbook.

Baby's Firsts Scrapbook

A baby's first year is filled with milestones, and every day a baby learns something new. Most parents will take numerous photographs of their baby's "firsts," and these moments can be preserved in an art scrapbook that parents will treasure and children will enjoy as they grow older. Combine small printed copies of paintings of children and babies with photographs of your baby for a creative and personal art scrapbook. Use pictures of cherubs and clouds to frame photos of your sleeping baby. Group your photos together with pictures of paintings of children for a collage effect. Pictures of famous paintings can be gleaned from old art books or printed from Internet art sites.

Vintage Wedding Scrapbook

A traditional wedding scrapbook can incorporate vintage art and photographs for a special touch. Vintage photographs are usually available at antique stores, flea markets, estate sales or downloaded from the Internet and printed on photographic paper. You may use an entire photograph as the background for a page and place your wedding photograph on the page so that the vintage photograph can be seen behind your picture. Secure the vintage photographs with old fashioned paper corners or outline them with old lace. Use a soft sepia tone or a black and white motif for the pages of the scrapbook. Use vintage photographs as frames for an entire page if you wish. Glue small wallet-sized photographs along the sides, top and bottom of a page. Place your wedding photograph in the center of the page. You can print antique-looking frames on photographic paper and use these to frame wedding photographs.

Sunday, April 7, 2013

Old Scrapbook Ideas

Scrapbooking is not a brand new hobby. People have been putting their memories into books since photographs could be developed. As it is with the saying "all things old can be converting to new again," likewise the craft and design of scrapbooking has found a way to make new things look old as well. Making a new scrapbook look old adds charm and whimsy to your layouts and design and makes the reader feel as if she were looking back in old time even if it was made this year.

Photographs and Images

Old Scrapbook Ideas
An easy way to do this is to print the pictures in sepia or black and white tones.
Whether you are cropping new photos or old photos from years ago, there are techniques you can use to make your photos fit the style of a vintage scrapbook design. For older photos, there are Photoshop programs to fix scratches, tears and spots. Search the internet to find out tutorials that can walk you through the steps, for example. If you're not savvy with computers, don't fret; many photo labs can fix these problems for a small fee. Likewise, there are ways to make your new digital photos look retro. An easy way to do this is to print the pictures in sepia or black and white tones. If you want to snap a photo that has blurry edges like those of older photos, simply smear petroleum jelly around the edges of your camera lens. Internet has many tricks for creating vintage-looking photographs for a layout, just go search on it.

Paper Inking

If you're yearning for that discolored, darker on the edges look from your Grandmother's memory book, there's a simple way to achieve this vintage look. Take the paper you are using to mat your photo with and rub the edge directly against a rubber stamp ink pad. Brown or black ink work well to edge photos. This technique is called direct-to-paper inking. It adds a subtle touch that can make the paper look worn and it makes the photo "pop." Also try inking the edges of the actual photograph for a special look.

Distressing Papers

There are many ways to make scrapbook paper look old, worn and used. Many of the techniques can be done with household items. Try wire brushing the paper, tea dying, coffee staining or using a sponge to dab on ink. Crumpling the paper up into a ball and then flattening it back out creates a pattern of lines and small creases. You can leave it just like that or add more detail by rubbing a cotton swab in chalk and then applying it to the lines and creases. Another simple vintage technique is tearing the paper to create the look and feel you desire.

Calligraphy

Don't forget about the style of fonts you are using. A modern font may not fit the style of your vintage scrapbook. There are thousands of free fonts available on the Internet. Try using a font that looks like a vintage typewriter or calligraphy. For a truly authentic look, purchase a calligraphy marker and try to hand-write your captions and journaling boxes.

Friday, April 5, 2013

Big Scrapbook Ideas

Big Scrapbook Ideas
Tennis Whell: Big Scrapbook Ideas
There are many type of scrapbook methods and technique, large scrapbooks is one of these which offer an opportunity to overemphasize celebrated dates, memories and events. Whether you choose to use metallic paper, busy contrasting designs or several different colors within the same theme design and layout, seemingly countless options are available. Pay attention to borders, using them to reveal subtle details about the overall page layout. Be bold and funny.

Sports

If you're the proud parent, partner or friend of a highly active child or adult athlete, craft pages that reflect larger-than-life sports equipment in honor of that person. Use two pages for optimum effect either with formatting text or colorful graphics, and cover the background with color paper reflective of the surface that sport is played on. For example, a football lover may get a green grass field lined with white paint and numbers for yard markers. A basketball person gets wood-grain cream to resemble the court. Add things like red lines and a black puck for noticeable detail for a hockey scrapbook. Once the background is completed, lay out photos or images of your athlete on the page. You'll also want to either draw, paint or glue in images of that sport's equipment such as footballs, basketballs, and soccer or golf balls. Do a little research and line the borders of both pages with interesting historical facts related to the sport. For example, the Chicago Bears have an ongoing rivalry with the Green Bay Packers. Along one page's border, list out the important information about the Bears, and Packers info along the other.

Romance and Hearts

Whether you're crafting a page in celebration of the day you met your soul mate, a wedding anniversary, Valentine's Day or are poking fun at all the boyfriends or girlfriends you've had over the years, romance offers ample opportunity to express yourself creatively. Select fabrics or wallpaper with heart and flower designs, and glue in alternating strips along the page for a background. Antique white lace attached along all four page borders adds sweet implications that are thematic. Postcards and garden magazines offer vibrant pictures of various flowers. Arrange them in large bouquets, mixing atypical color partners for visual detail. Cut out round puffy letters from construction paper of the names of all the boys / girl or one that who stole your heart. Type up, print or calligraphy a romantic poem reflective of love and glue it in the center. Pick out a scrap of wallpaper for example, white with red polka dots and cut it to 3 by 5 inches. Cut out little photos of old lover, glue them to individual index cards and staple the wallpaper cover on top. Glue the entire miniature photo album by the back of the last index card into the center of the scrapbook.

Fall Harvest

There's no better way to ring in the crisp breeze of a fall season than by building a double page in your book resembling the harvest bounty central to the spirit of the Thanksgiving season. Use flat or metallic brown, orange, red and gold paper. Cut images out of food magazines. Place the colored papers down as background. Cut them into stripes, polka dots or dinner plate shapes. Allow the edges of these pieces to overlap if necessary to ensure color in every space. Draw free-hand or use a stencil to make a basket in the shape of a horn. Cut them out and affix them directly across from each other in the book. Use photographs of family members, friends and special acquaintances to line the borders around the basket. Fill the basket with the pictures from the magazines. Add the word "Thanksgiving" with the year atop the page in the center and of cause the “person name” with beautiful formatted text.

Wednesday, April 3, 2013

Free Quips & Sayings for Scrapbooking

Clever quips and sayings are hard to come by, which is why Bright Hub has put together about 15 free quips and sayings for your scrapbooking projects, as well as some helpful pointers to maybe get the ball rolling with recognizing and including your own personal quips and sayings.

Free Quips & Sayings for Scrapbooking

Quips and Sayings For Scrapbooking

The best free quips and sayings that you will ever find are the ones made up by your family, your friends, and you because they will be the most meaningful. Even if it was a strange or funny thing that said that everyone quotes when everyone gets together, it will be the better choice for anything that you might find somewhere else. That being said, it's a good idea to include some variety in creative projects or maybe you need to find something that you don't have a saying for, so we have provided a couple example of free quips and sayings for you to use in your scrapbooking project.

Selecting Quips and Sayings For Your Scrapbook

As I mentioned before, the best additions to your own scrapbook are the ones that the most relevant to you. This can be something that your friends and family came up with or something that was said on a memorable day. But if you can't think of any it's always good to stay relevant to what it is the subject of your scrapbook is.

Staying relevant doesn't mean you can't be creative and think outside to box. The saying "To boldly go where no man has gone before." is generally thought of when space exploration is brought up, but it can also just as easily accompany a photograph, maybe of someone on a swing set or of a cave that was visited. Taking sayings and making them your own is fun and it adds a lot of different tones and emotions to pictures.

Remember that while you can mix and match quips and sayings to fit to what you have, they have to be somewhat appropriate otherwise it's just an oddly put together set of images and text. Just as a sort of general example you probably wouldn't want to include a saying related to winning and losing next to the birth of a family member.

15 Free Quips and Sayings
  • Could it be that all those trick-or-treaters wearing sheets aren't going as ghosts but as mattresses?
  • If a man is standing in the middle of the forest speaking and there is no woman around to hear him ... is he still wrong?
  • When real people fall down in life, they get right back up and keep on walking.
  • I've missed 3000 shots. Twenty-six times the game-winning shot has been trusted to me, and I've missed. I've lost over 300 games. I've failed over and over and over again, and that is why I've succeeded.
  • Adolescence is perhaps nature's way of preparing parents to welcome the empty nest.
  • The first sign of maturity is the discovery that the volume knob also turns to the left.
  • Nothing in the world is friendlier than a wet dog.
  • The trouble with children is that they're not returnable.
  • The key to happiness is having dreams. The key to success is making your dreams come true.
  • Laughter is the shock absorber that eases the blows of life.
  • Why not go out on a limb? That's where the fruit is.
  • There's no happier moment in life than to awake Christmas morning and be a child.
  • If you find it hard to laugh at yourself I would be happy to do it for you.
  • Frustration is trying to find your glasses without your glasses.
  • Birthdays are good for you. Statistics show that people who have the most live the longest.

Additional Resources for Quips And Sayings

Quotes, quips, and sayings for scrapbooks can be anything that resonates with you on a personal level. If I haven't provided that in my article allow me to offer you a few more articles that may have what you're looking for.

Tuesday, April 2, 2013

Scrapbook Banner How to

Scrapbook Banner How to
Make your scrapbook banner a reflection of the page it announces and don't limit yourself to one dimension

Don't just print out a black typed banner and glue it to the top of your scrapbook album pages. Add banners that mimic those seen at parties held in the office and home. Scrapbook banners don't have to be stationary either, add some movement within the scrapbook for a pleasant difference.

Alphabet Banners

Spell it out in your scrapbook banner by using letter cut-outs of the alphabet. Just as you would put together a banner to hang from one wall to another at a birthday party, announcing "Happy Birthday," do the same with your scrapbook. Use cut-out letters of the alphabet — each paper letter decorated in the scrapbook theme and linked together with a ribbon, for example — to announce your scrapbook page topic. Alphabet letters could be outlined with symbols matching the scrapbook page topic, such as the letter "B" outlined with small cake images. Other cut-out images can be used, too.

Announcement Banners

Scrapbook pages picturing baby birth pictures could incorporate stork banners at the top of the page in keeping with the arrival of the little one. Storks depicted with a large white diaper or bag in their mouths as they fly through the air make excellent banners for baby scrapbooks pages. Put a photo of the newborn after birth atop one stork "package" on one page and a photo of the proud parents with baby in their arms in another stork's hanging bag on another page.

Creative Banners

Make your scrapbook banner a reflection of the page it announces and don't limit yourself to one dimension. Keep to the theme of that page as a whole. Use banners made of real toothpicks for the cooking pages, laminated or natural leafs for hiking pages, kid photos for your teaching page or lipstick-pressed impressions for fashion pages. For scrapbooks with only one theme, create banners that highlight each different aspect of the topic. For example, Christmas scrapbook banners can include real mistletoe, pictures of gold-colored pine cones, snowmen or angels and the name Jesus spelled out in block lettering.

Hanging Banners

Add movement to your scrapbook pages with banners that hang and swing from the top of each page. Staples or glue can keep the banner attached to the page. Strings, ribbon, cord and wire can be tied to each individual letter of the banner and then attached to the top of the page. Drop banners add a three-dimensional aspect to the scrapbook when holding it up to show pages to family and friends.

Sunday, March 31, 2013

Quick and Simple Scrapbooking Ideas

I enjoy scrapbooking as a hobby because it produces great results. Unlike some hobbies that only sharpen the skills but don't produce anything, with scrapbooking, I not only get to develop my creative skills but also create great pieces of artwork in the process.

Maybe this is why scrapbooking is one of the hottest hobbies in the country. As a testament to how big scrapbooking is, there are numerous shows and magazines that have cropped up on the subject. You can also find annual fairs and conventions just on scrapbooking. On the Internet, there are websites, webzines and web rings that are devoted to scrapbooking.

Quick and Simple Scrapbooking Ideas
Scrapbooking products are more and more sophisticated these days and they are all designed to make scrapbooking as simple as possible
Now scrapbooking might seem a little daunting at first if you are a person who feels you have no artistic or creative bones in your body. Cutting, sticking, and designing may seem like a nightmare if you are not really much into the practice. You might even find the prospect of putting together one page of artistic work too much for you to handle.

But I want to tell you that making a scrapbook is not that difficult. In fact, it can be the easiest thing in the world especially with the tools and gadgets that are coming out and being sold online and in craft stores. There are scissors that cut lines with designs in them. There are punchers that not only punch holes but can punch different shapes. Craft stores also sell stickers that we as scrapbookers can stick into our pages for that more finished touch.

If you just know what to do, where to go and how to go about it, scrapbooking can be a breeze.

Below are just couple of the ideas and tips on creating quick and simple scrapbook pages.

Buy Prepared Pages

Scrapbooking products are more and more sophisticated these days and they are all designed to make scrapbooking as simple as possible. Maybe you feel like you don't have the talent to put together one page even if your life depended on it. Maybe you just don't have the time to create a layout that will look nice with the photo or photos you want to use. Why worry about it when you can buy prepared scrapbook pages that already have layouts and designs. You just need to add the finishing touches like the photo and some accessories if you feel like it.

You can buy these pages based on themes. For instance, there are pages that can be used in a wedding scrapbook; others can be used in a baby shower or in a kid's birthday party. Often, there will even be slots where you can put photos and other notes.

Stick Them Up

Another innovative product that has made my life and the lives of other scrapbookers worthwhile is scrapbook stickers. Like the scrapbook pages, these stickers can also be purchased in themes. Luckily, the themes are not limited to occasions and special events.

For instance, in addition to the usual themes of birthdays, Christmas, baby showers, weddings and the like, there are stickers that will also depict Christian sayings, kiddie images, business matters, girly stuff and sports. Don't worry; there are a lot of themes to choose from.

These stickers are great when you are decorating a page that you have already put together. They often add color and appeal to the page without the hassles of drawing, cutting and pasting. All we as scrapbookers have to do is buy the stickers, peel the sticker off and stick it to the page.

Using these techniques makes scrapbooking easy enough that even a child can do it and my grandchildren have done so many times.

Ideas for Magic Mesh & Scrapbooking

Magic Mesh is a textured scrapbooking medium that is self-adhesive and movable. This craft material is available in many colors and is packaged in 2-1/2 inch rolls and 12 inch square sheets. You can cut Magic Mesh with scissors or die-cut machines, and enhance it with glitter and rhinestones. Magic Mesh adds pizazz and dimension to handmade greeting cards and scrapbooking layouts.

Ideas for Magic Mesh & Scrapbooking
Magic Mesh For Your Next Scrapbooking Project

A Zoo Theme

After your next trip to the zoo, print out your favorite photos and design an animal-themed scrapbooking page using Magic Mesh. Place several colorful animal stickers along the very bottom of your pages. Apply black or brown Magic Mesh directly over the stickers to create a caged animal display. Randomly position your zoo pictures around the rest of your scrapbooking page.

A Halloween Theme

Use bright orange Magic Mesh for your next Halloween scrapbooking project. Cut the material into circles for pumpkins and then top with green mesh for the stems. Strategically place the pumpkins around your Halloween photos. You can also trim black Magic Mesh into spider webs for a spooky scrapbooking page.

A Christmas Tree

Trace a large Christmas tree image onto a 12-inch-square sheet of green Magic Mesh. Cut the tree out and adhere it to your scrapbooking page. Next, crop your favorite holiday photos into circles and attach them to the tree stems as one-of-a-kind ornaments. Embellish your tree with silver or gold glitter and then top with a yellow Magic Mesh star.

A Tropical Theme

Cut bright blue Magic Mesh into peaked waves and adhere to the bottom of your scrapbooking pages. Trim out simple fish shapes from green and purple mesh and attach to the ocean waters. Embellish the fish with glitter for added sparkle. Place your cropped vacation photos above the waves for a whimsical tropical theme.

A Race Car Theme

If your family members are NASCAR fanatics, consider designing a racetrack-themed scrapbooking page using Magic Mesh. Apply black mesh to the sides of your pages. Next, attach colorful race car stickers directly onto the mesh. Strategically place your race track photos alongside the mesh track.